Network resilience

Every so often we experience a network outage because a piece of equipment fails. One switch we use across our campus has a power supply failure mode that trips the power, so one bad switch takes out everything. However, most of time time I’m impressed at just how resilient and reliable the kit is. Network switches in dirty, hot environments run reliably for years. In one case we had a switch with long since failed fans, in a room that used to reach 40°C. It finally fell over one hot summer’s day when the temperature hit 43°C. Even then it was ok once it had cooled down.

Just a bit damp

Most recently there was a water leak in a building. I say leak, a pressure vessel burst so mains pressure hot water poured through two floors of the building for a couple of hours.

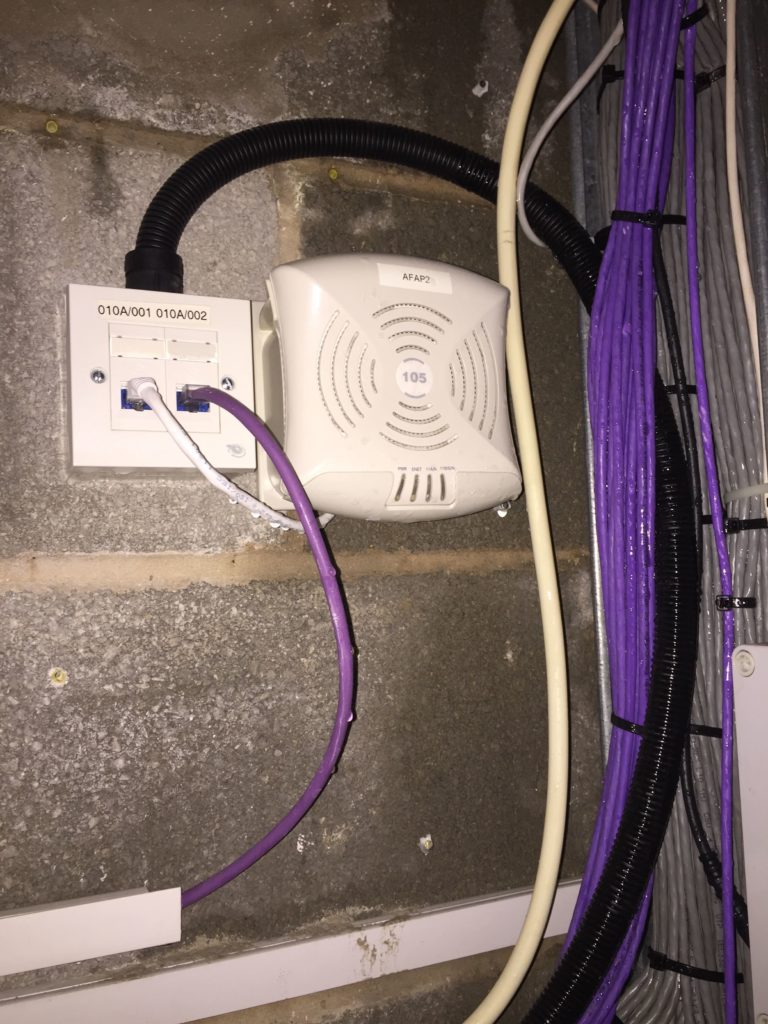
Let’s not reflect on the building design that places active network equipment and the building power distribution boards next to the questionable plumbing but instead consider the life of this poor AP-105.

Happily serving clients for the past seven or eight years, it was time for a shower. It died. Not surprising. What’s perhaps more surprising is once dried out the AP functioned perfectly well.

This isn’t the first time water damage has been a problem for us. Investigating a user complaint with a colleague once we found a switch subject to such a long term water leak it had limescale deposits across the front, the pins in the sockets had corroded. It was in a sad way but even though the cabinet resembled Mother Shipton’s cave, the switch was still online.

I have seen network equipment from Cisco, HP, Aruba, Ubiquiti, Extreme, all subject to quite serious abuse in conditions that are far outside the environmental specifications.

This isn’t to suggest we should be cavalier in our attitude towards deployment conditions – rather to celebrate the level of quality and reliability that’s achieved in the design and manufacturing of the equipment we use.

Farewell sweet AP-93H

Towards the end of 2018 we marked the final Aruba AP-125 being decommissioned. A venerable workhorse of an AP, these units provided excellent, reliable service for a really long time. Now it’s the turn of another stalwart of our network estate – the AP-93H.

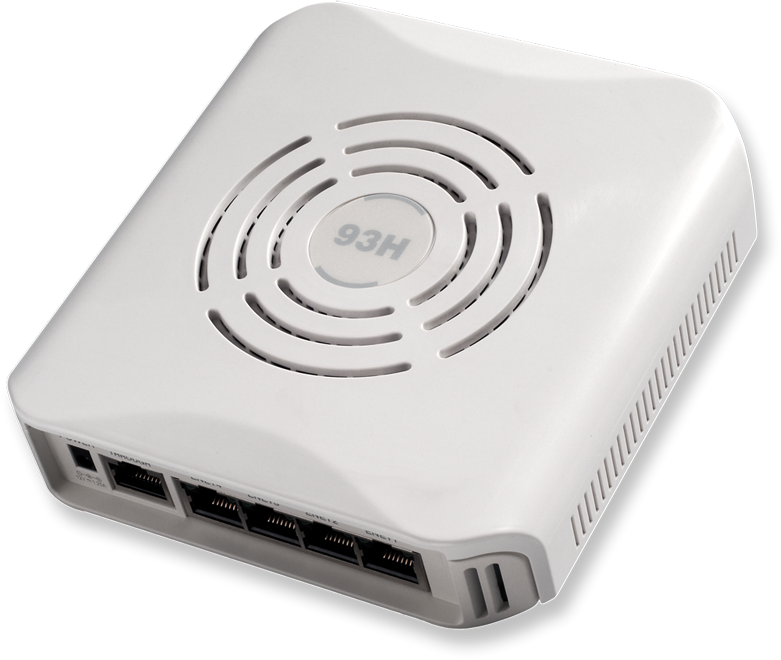
Aruba AP-93H

The H apparently stands for “hospitality”, or so I’m told… I’ve never checked, and these APs fit over the top of a network socket. They have been invaluable to us.

Aruba are not alone in making devices in this format. Cisco, Ubiquiti and others do the same, but in each case they solve a really big problem. Namely we didn’t put enough wires in.

We’re replacing the AP-93H with Aruba’s current model the AP-303H but it isn’t just bedrooms that get the hospitality treatment.

I’ve written before about our challenges with asbestos, but also the need to have an agile and responsive approach to fast changing network requirements in academic and research environments. The hospitality units are a fantastic way to expand network capacity where there’s no available ceiling level socket for one of our usual models, or maybe we’re not allowed to touch the ceiling anyway.

Stick an AP-303H over the top of a double socket and you can have Wi-Fi and four sockets available. Three of those network sockets can either tunnel that traffic back to the mobility controller or bridge locally to the switch – it’s up to you.

The AP-93H has, like most of the other hardware we’ve replaced, served us well. They’re end of life and not supported past Aruba OS 8.2 and so they have had to be retired. Although they’re dual band, these APs are only single radio so you can have either 2.4GHz or 5GHz, not both. So we welcome the upgraded version, perhaps wish the mounting plates were the same, and carry on with the upgrades.

Aruba OS8 cluster upgrade

Far from the first to share my thoughts about such things, I saw a live demo of an Aruba OS8 cluster being upgraded at the company’s Atmosphere event a couple of years ago. Controllers that were serving the conference were upgraded live, while we all checked our devices to confirm that we were still online.

The live cluster upgrade is probably one of the biggest headline features of AOS8. There are others I particularly like, but that’s for another time. The process works best if you have a reasonable amount of cell overlap in your design.

First all the clients and APs are moved away from one controller in the cluster, and this is upgraded. Once it comes online and syncs up it becomes a cluster master, in a cluster of one. Then a group of APs (AOS calls this a partition) are selected. The aim is that none of the APs selected will be neighbours of each other. The new firmware is pre-loaded onto the partition of APs. Next AOS encourages clients to leave these APs using all the tools of clientmatch it can before the APs reboot. The aim is clients will be able to associate with a neighboring AP.

Once the upgraded APs come back up they’ll join the upgraded controller and so the process rumbles on. If you have multiple controllers at some point AOS will upgrade other controllers and expand the cluster.

For always on networks like a university campus, hospital or airport, this is a great step forward as it allows much more regular code upgrades. A good thing.

However, and there always has to be a downside doesn’t there, it doesn’t always go quite as expected.

I performed a cluster upgrade from 8.3 to 8.4 and it took a long time. In fact it took about 17 hours to upgrade 2500 APs and four controllers. APs can get into a state where the software pre-load doesn’t work. Rebooting the AP will fix this but AOS doesn’t do that. Instead it retries the pre-load five times at 10 minute intervals. This results in the partition of APs taking almost an hour. If you have one AP that doesn’t behave in each partition the entire process drags out for a really long time. Aruba have acknowledged this is an issue and I expect eventually there’ll be a fix or workaround.

So you have a choice – you can do a one hit reboot of all the controllers into new firmware, just as we always did, or you can do a cluster upgrade. One is easiy to communicate to people, the other is might not need any comms at all… it depends on your network design. If you’re confident of cell overlap being really optimal, it perhaps doesn’t matter how long the upgrade takes because your users will hardly notice.

Wi-Fi Design in Higher Ed

We all know the first stage in Wi-Fi design is to gather the requirements. But what if you can’t? Or you know full well that whatever requirements are outlined, they’ll probably change tomorrow. What if gathering all the potential stakeholders together in order to work out what on earth they actually all want is impossible? What if you have to support pretty much any client that’s been on the market in the last 5-10 years? Welcome to designing Wi-Fi for Higher Education.

BYOD has been a thing for some time now, as people expect to use their personal mobile device on the company Wi-Fi but even among corporates that have embraced this, there’s usually a high level of control that underpins assumptions about the network. Employees are often issued laptops/phones that are managed with group policy or some form of Mobile Device Management (MDM). IT can push out drivers and can usually decide what hardware is supported. For genuine BYOD there’s usually a policy to determine what devices are supported and that list is reasonably well controlled, limited to business need.

In the HE sector that doesn’t apply. Yes we have managed laptops, which are known hardware running a centrally controlled build, but the majority of devices on our network are personal devices belonging to students. We provide services to academic departments, but if they decide they’re going to buy whatever they like and then expect us to make it work…. that’s pretty much what we’re there for.

Then there’s the question of what users are going to be doing… and we don’t know. Users and research groups move around. Recently a team with a habit of running complex, high bandwidth SQL queries over the Wi-Fi moved out of their office where the network met their needs to a different building where it didn’t and the first I knew about it was complaints the Wi-Fi was down (it wasn’t down, it was just busy but more on that another time)

Yes there are some communication and policy problems where improvements could be made, but the key to designing a network well for HE is to be flexible and as far as possible do what you can to make things futureproof.

“Hahahahaha…. Futureproof” I hear you guffaw. Indeed, what this means practically is making sure we have enough wires installed for future expansion. Our spec is for any AP location to have a double data socket, and we put in more locations than we intend to use precisely to allow flexibility. This can be a hard sell when the budget is being squeezed, but it has paid off many times, and is worth fighting for.

Some of the key metrics of UK universities focus on the student experience. We prioritise delivering a good service to study bedrooms – something that has required wholesale redeployment of Wi-Fi to some buildings.

And so, dear reader, you’ll realise that we do have some requirements defined. Experience and network monitoring tells us we have a high proportion of Apple iOS devices on the network – so coverage is based on what we know helps iPhones roam well. We know a lot of those devices are phones so we factor that into the RF design. We know how much bandwidth our users typically use – it’s surprisingly little but we do have to support netflix in the study bedrooms.

To allow for the relatively high density of access points required to deliver the service students expect we use all available 5GHz channels across our campus and we use a four channel plan on 2.4GHz – both bad news according to some people, but it works.

Perhaps the most important aspect of providing Wi-Fi for the weird combination of enterprise, domestic, education and unpredictable research demands that Higher Ed brings is to make sure you say “yes”. The second you tell that professor of robotics they can’t connect to your Wi-Fi, a dozen rogue APs with random networks will pop up. Agile, flexible, on demand network design is hard work but it’s easier than firefighting the wall of interference from that swarm of robots…. or is that a different movie I’m thinking of?

The state of 802.11r

802.11r or BSS Fast-Transition is a way of significantly increasing the speed of roaming in Wi-Fi environments. More specifically it’s an enhancement to the Wi-Fi standard that describes how to avoid having to perform a full WPA2 authentication when roaming to a new AP.

For the vast majority of clients Fast-Transition (FT) is no big deal. If a user is idly browsing the web, or their client is performing some background sync tasks, a roam from one AP to another isn’t something they notice.

Where it matters is when there are voip clients, or any application that doesn’t tolerate packet loss or high latency.

In an enterprise environment it’s common to use 802.1X authentication. This is quite a chatty affair, and it takes a bit of time. The hallowed figure often quoted for voip clients is to keep latency under 150ms. The process of roaming to a new AP and then performing 802.1X can take longer than this.

With FT, the network authentication part of the roam is reduced dramatically. However, it does need to be supported by the client and network.

Like many standards, there were some elements open to interpretation. Some network vendors required a client to support 802.11r in order to connect to the network, others did not. But with our Aruba network it was initially necessary for all clients to support 802.11r before you could switch it on.

This has changed over time and most vendors have moved to a position of allowing clients that do and do not support FT to co-exist on the network.

Client support has been mixed. For example Apple’s iOS does support 802.11r but MacOS does not (at the time of writing) but happily coexists with it.

Windows 10 includes support, but this seems to be dependent on the Wi-Fi chipset and driver. Which brings me to the blunt message of this post.

In an Aruba OS8 environment, with a jumbled mix of clients, it’s not yet possible to enable 802.11r. I’ve just tried it and run into a couple of Windows 10 laptops that were no longer able to connect to the network. The symptoms observed were the EAP transaction with RADIUS timing out. The user experience was, of course, “the Wi-Fi is down”.

Ekahau Connect

One of the tools that’s made the most difference to my work with WiFi has to be Ekahau Site Survey (now known as Ekahau Pro) and it’s now better than ever. I’m just going to go straight for the exciting part. Ekahau Connect lets you plug your Ekahau Sidekick into your iPad for surveying and, yes, that is as lightweight and functionally glorious as it sounds. But there’s more…

Ekahau have turned what was one application, Ekahau Site Survey, into a suite that form Ekahau Connect. There’s Ekahau Pro – the Windows/Mac application that many WiFi professionals know and love. Ekahau Capture – Packet capture utility for the Sidekick. Ekahau Cloud – a cloud sync service, and Ekahau Survey – an iPad app used for surveying with the Sidekick.

To get the advantage of all this new goodness it’s pretty clear that you need a Sidekick. I found the Sidekick to be a worthwhile investment from the get go, but now I can connect my Sidekick to my iPad, it’s become something of a must have.

For surveying, for me, it’s transformative. The Sidekick with an iPad combination is lightweight with long battery life and much easier to operate on the move. Pan and zoom around the floor plan is so much smoother and easier on the iPad, and that really matters when you’re on your feet and also having to negotiate obstacles in your path.

I’ve been using ESS for the last few years and have always struggled to come up with a really satisfactory workflow for surveys. In part that’s because I’m often dealing with small academic offices (the offices are small, not the academics) which are not always easy to move around, and the doors all have aggressive auto-closers that try to eat my laptop. In short, I’m usually fighting piles of paper, books and doors, all while ensuring I’m being accurate with my location clicking on the floor plan. Even the lightest weight laptop starts to feel heavy after a while. I’ve been using a Lenovo Yoga, for the fold over touchscreen design and whilst it’s easier to carry around, it’s actually fairly hard work to operate because Windows and touch have never really gelled.

On the iPad it’s a different story. For a little while I’ve been playing with the beta of Ekahau Survey as the team beat back the rough edges (there really weren’t very many) and took on board feedback from everyone giving it a spin.

Using an iPad I can survey more quickly, make fewer errors that I need to correct, and keep going for longer. It’s a real productivity boost.

The workflow is pretty straight forward. Create your project in Ekahau Pro then export the project either to Ekahau Cloud or to the internal storage of your Sidekick. The latter option being particularly useful if surveying for a site where you don’t have internet access for your own device. The Ekahau team have talked a lot about how they ensure data isn’t lost if there’s a crash or the battery dies, by saving data to the iPad, the cloud service and the Sidekick.

From the moment I got my Sidekick I’ve wondered how long it would be before there was a packet capture utility… and now it’s here. I didn’t have advance information, it was just an obvious use case. Wireless packet capture under Windows has always been a slightly tricky task, Ekahau Capture and Sidekick make it really easy and the dual radios mean you can get complete (non-scanning) captures on two channels at the same time.

I’ve briefly mentioned Ekahau Cloud, but it’s worth exploring a little bit because it makes sharing projects easy. This is a big help for teams. It also means it’s possible for a team to work on different floors of the same building, and sync all that data back to the same cloud project.

I don’t want to neglect Ekahau Pro in this big update as it’s had more than just a new name. Quite a lot has changed under the hood. The visualisations are improved and I believe there’s also been some work done on improving the prediction algorithms.

Bottom line is if you’re already using Ekahau tools, especially if you already have a Sidekick, you’ll want to spring for this new suite so it’s worth putting together a case for management or your accountant to consider.

Professional tools – Ekahau

As I started to take up the mantle of Wi-Fi human for a university campus, it was mentioned that we had “the Ekahau laptop”. This turned out to be a woefully under powered old netbook with Ekahau Site Survey installed. Nobody knew how to use it. So I learned.

Fast forward a few years and I’m an Ekahau Certified Survey Engineer who’s designed and surveyed a lot of our campus using this tool.

Ekahau Site Survey is, as the name suggests, a survey tool. It’s also a Wi-Fi design tool. I’ve used it extensively for both tasks and it’s probably one tool I’d struggle to do without.

One of the strengths of ESS it’s relative simplicity. At the most basic level you import a floor plan, set a scale and then you’re ready to use this for predictive design work, or a real world survey.

Surveying is a matter of walking around a building, while clicking on your location on the floor plan. There’s a technique to this of course, but it really is just a matter of walking the floors.

To use Ekahau Site Survey as a design tool you’ll need to draw on walls, doors, filing cabinets and other attenuation areas as appropriate. Then you can place APs on the plan and ESS will show you what coverage can be expected.

What should be obvious about both predictive and survey data is the pretty visualisations generated by ESS will show you exactly what you’ve told it. If you put junk data into your predictive model by saying all the walls are drywall with a 3dB attenuation, your design isn’t going to work very well when it turns out you have 10dB brick walls. So it’s important to have some idea of the building construction and, ideally, have taken measurements.

Likewise with the survey side, if you’re inaccurate with your location clicking or walk 100m between clicks and force ESS to average the data over too large an area, you’ll get a result that’s not as useful.

In short, you do need to know how to use the tool – just like anything.

A quick mention of WiFi adapters. ESS works by scanning the selected WiFi channels (all available in your regulatory domain by default) and recording information and received signal strength of the beacons transmitted from access points. It’s necessary to have a compatible WiFi adapter that can be placed in monitor mode. Low cost options are available. If you give ESS two or three adapters it will spread the channel scan across these, allowing data to be gathered more quickly. ESS will also use the built in WiFi of your laptop to ping an IP or perform speed tests against an iperf server.

I started with a single USB interface, which I used to bash on door frames, before upgrading to a quick release (lego glued to the laptop lid) USB hub with three interfaces connected. This made the laptop lid too heavy and it would fall backwards.

To counter these first world problems, but also to allow for other interesting functionality, Ekahau made the Sidekick. It’s a neat box containing two dual band WiFi radios (802.11ac), a very fast spectrum analyser, processing capability and storage, and a built in battery.

For surveying Sidekick isn’t a necessity but it makes life much easier. The data gathered is more complete, the laptop battery lasts longer and the spectrum analyser capability turns ESS into a powerful troubleshooting tool.

Extending wireless access with a PTP link

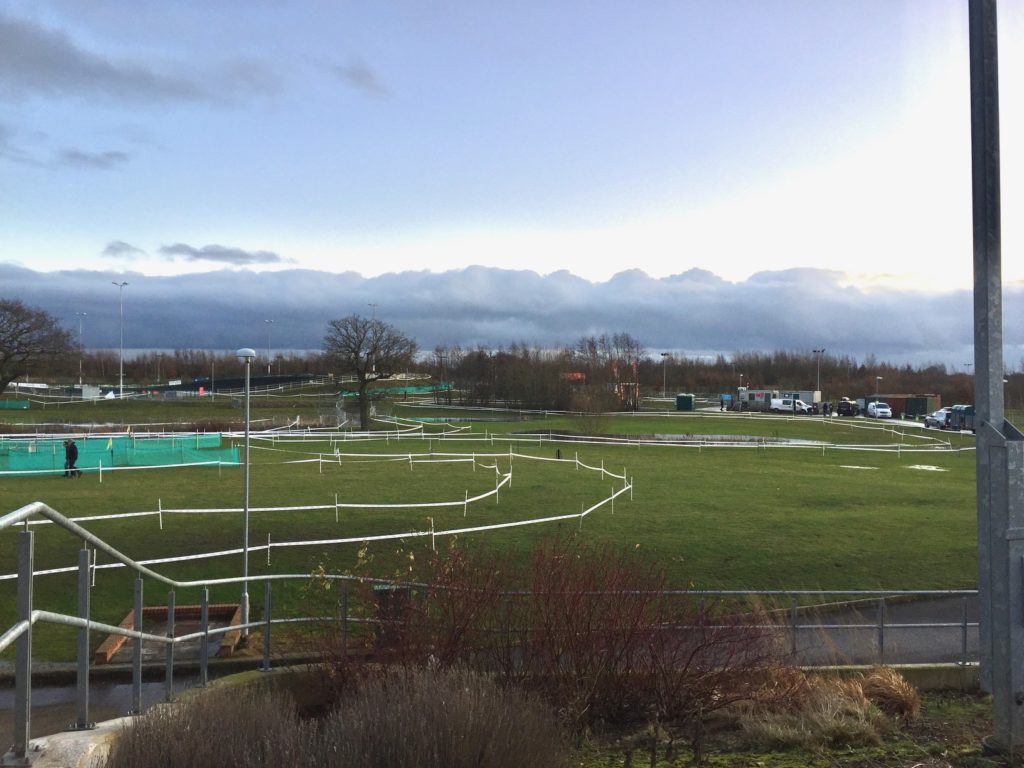
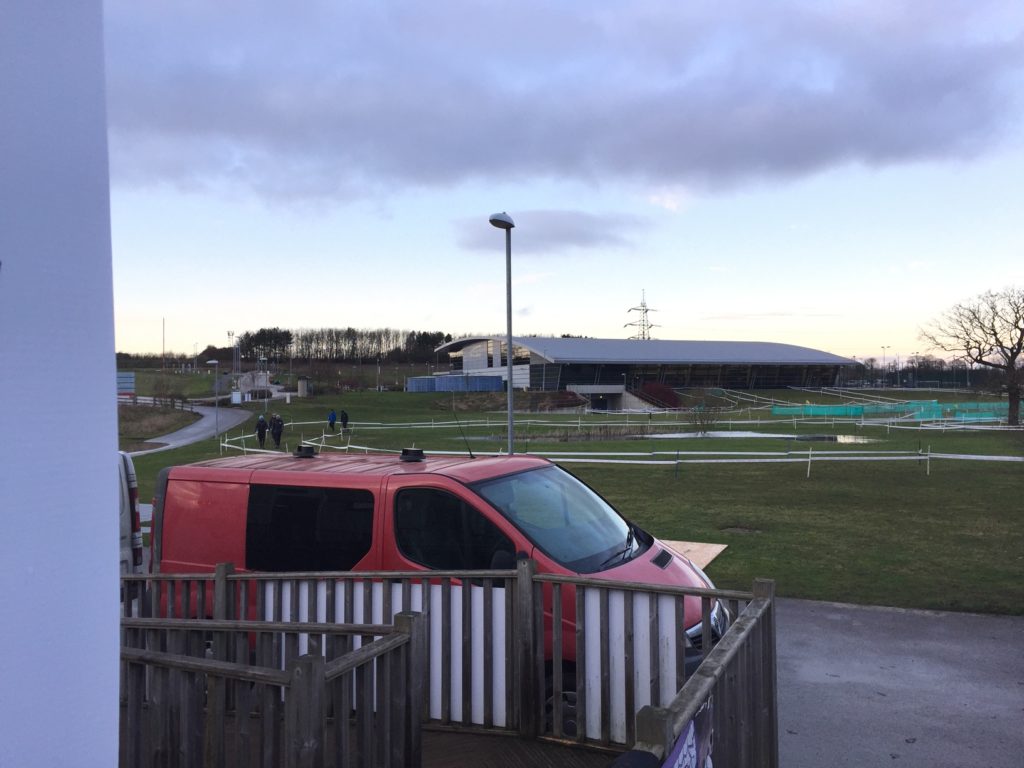
Situated across the lake, next to a lane that borders some fields, is the outdoor lab site of an ecology project researching moorland management. Fascinating in itself, the team tending a very strange allotment sized plot of land are recording data and processing e-mails while literally in the field.

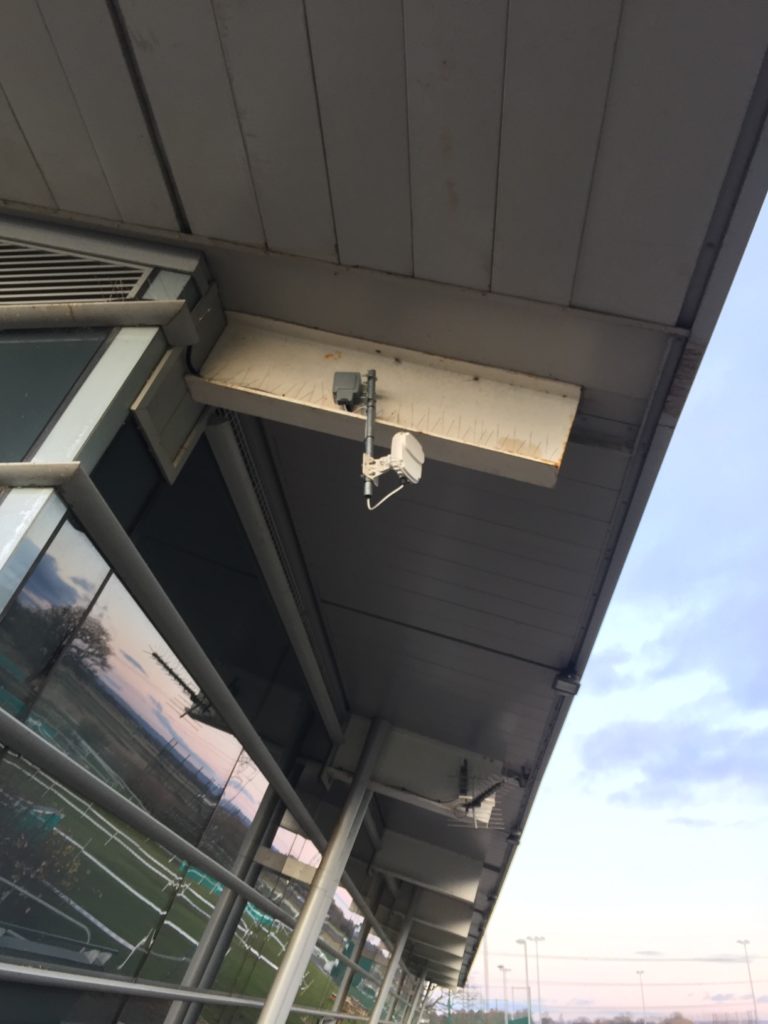
The site is over 300m away from the nearest external Wi-Fi AP in that part of campus and despite the distance the 2.4GHz band is surprisingly usable providing you stand in just the right place and hold your laptop aloft. Because it nearly works the initial proposal from users was to try building a DIY antenna out of kitchenware and a high power USB wireless nic of dubious legality.

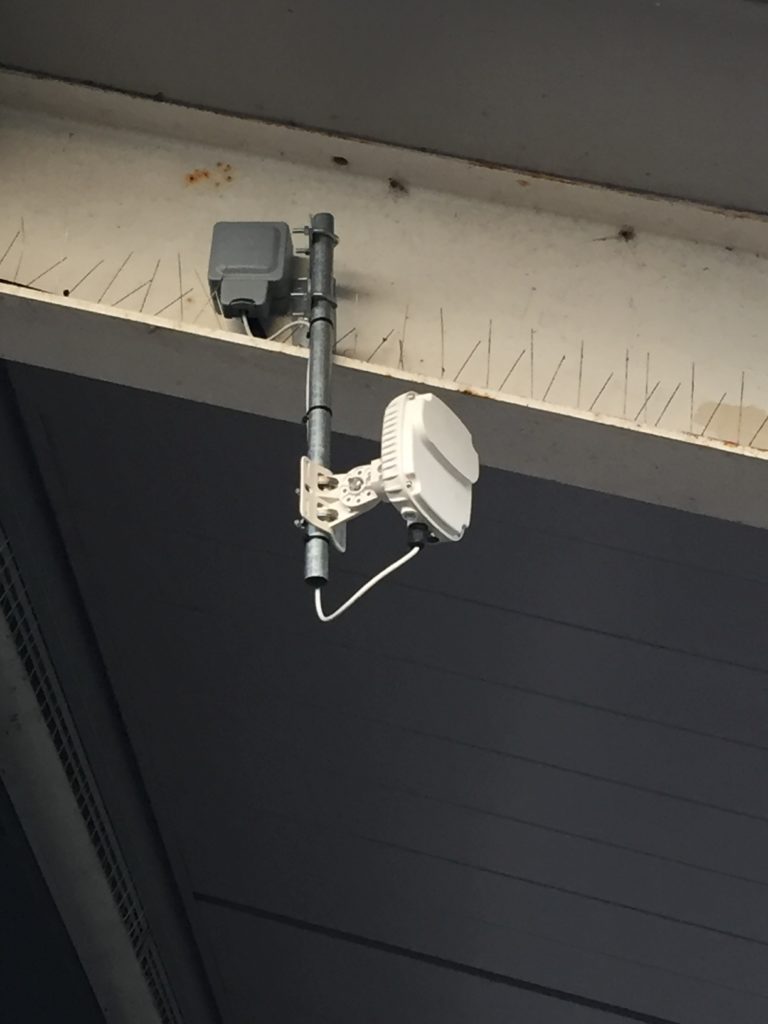
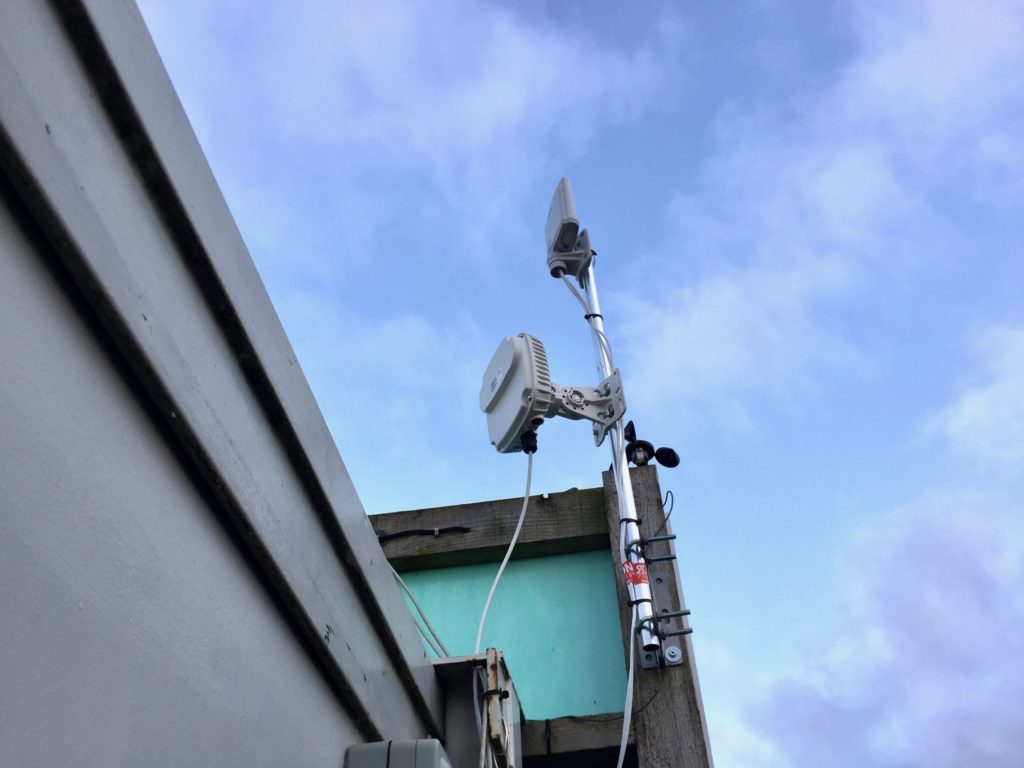
I recommended against this and instead have been able to setup an Aruba AP-275 linked back to the campus network with a point to point wireless bridge.

The wireless bridge in question is a pair of Ubiquiti Networks Nanobeam AC, part of the company’s Airmax range of products. This is the first time I’ve used any Ubiquiti gear on campus but I’ve long been a fan of what can be done for a really modest outlay using the Ubiquiti equipment.

Ubiquiti gets a bad rap among wireless geeks. There’s good reason for this. It’s pretty cheap and their Unifi managed WiFi offering has long lacked features that would really qualify it to be truly ‘Enterprise’. The Airmax gear is also inexpensive, built to a price and, frankly, it can look a bit flimsy. Next to the Aruba AP-270 series the Nanobeam looks almost comical in its lack of weather sealing. However, I put a pair of a previous generation Nanobridge M5 devices up, somewhere in the wilds of North Yorkshire several years ago, and have never had to touch them since. Wireless ISPs like Beeline Broadband have been using affordable gear from Ubiquiti and Mikrotik for years to bring broadband to areas that otherwise end up with DSL speeds little faster than dialup.

I think one of the reasons this gear gets a bad name is the way it’s sometimes used. Ubiquiti make some high gain antennas and it’s very easy to significantly exceed the power levels permitted in a regulatory domain. I’ve come across badly installed, poorly aimed radios where the country has been set to whichever would let the installer turn the power up to a metaphorical 11 (but probably higher than that). Because the equipment is inexpensive and accessible this is probably not a great surprise. There have also been some firmware shockers too, but again bad practices have left radios running in the wild with critically vulnerable firmware.

The Airmax gear may not be engineered like our Aruba external APs but it’s affordable, functional, can certainly be reliable and I have to say it’s a joy to use with a really nice user interface. Ubiquiti also make a management server available called UNMS. It’s still in beta, but it does a good job of providing a single pane of glass for seeing the network status and managing Airmax radios.

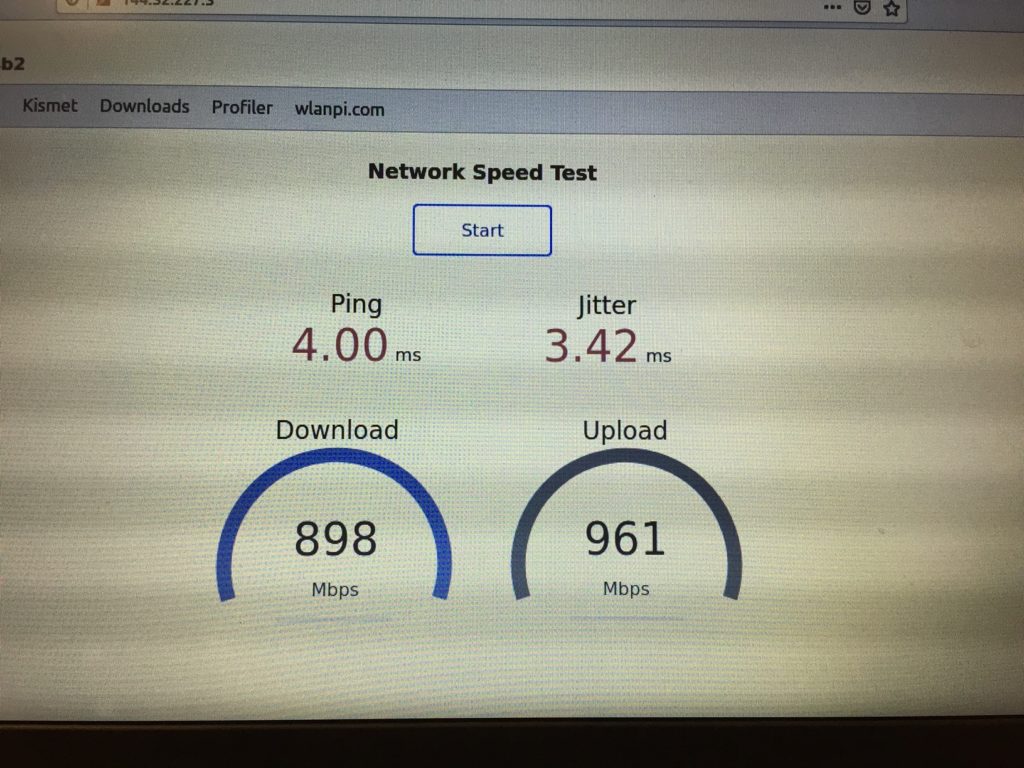
The relatively short link distance (indicated 280metres) means the Nanobeams can achieve 256QAM to provide 150Mbps throughput with a 20MHz channel width. It may be a distance that WISP engineers would laugh at… but it’s been a useful problem solver and the hardware cost under £200.

IPv6 on the Wi-Fi

Yes yes yes… We all know that we ran out of IPv4 addresses long ago and IPv6 has been around for 300 years and is the solution to all our problems.

But, we’re still not using it. So why not?

“IPv6 is haaard”

For people who are used to an IPv4 world, with 32 bit addresses you can remember like 178.79.163.251 and broadcast domains with a few hundred addresses, IPv6 can be a terrifying prospect with 128 bit addresses that look like 2a01:7e00::f03c:91ff:fe92:c52b, umpteen billion addresses per subnet, a whole new reliance on ICMP and… well, it’s just different.

I never fail to be slightly surprised how conservative and resistant to change some folk in IT can be. It’s just human nature of course, to keep things working and try to avoid too much rapid change, but still.

Dabbling in IPv6 can result in some odd behaviour as it will generally be used in preference to IPv4. So if you can resolve a IPv6 address but can’t route to it, things break. There are ways to address this and most web browsers do, but people have been caught out and that led to IT departments disabling IPv6 on all Windows systems, for example.

Truth be told, IPv6 isn’t all that hard, so why haven’t we deployed it on our WiFi?

She doesn’t have the capacity Jim!

The problem on our network is address table capacity. Previously I’ve talked about a problem we encountered of filling the arp table on the core routers. Keen not to be burned twice by the same problem, IPv6 presents new challenges.

Firstly there’s the obvious issue of each address being four times the size and therefore needing more memory. Then there’s the issue of just how many addresses you’re dealing with.

With IPv4 a client on our network requests an address via DHCP, is given one, and that’s the end of it.

With IPv6 clients come up with a link-local address (starting FE80:) which can be used to talk to other devices on the same subnet without any configuration being done at all. Then, using SLAAC (Stateless Address Autoconfiguration), the router advertises it’s address and, by virtue of that, the local subnet. Clients then come up with their own IPv6 address based on their hardware MAC address. But this address, built out of the MAC address of the client, can be used to track individual machines as they move around different networks. To avoid this most operating systems will also come up with a privacy address. This is another IPv6 address that’s valid in the subnet but is not based on the MAC address of the hardware. Because there are so many addresses in an IPv6 subnet, the chance of a conflict is… well, you don’t have to worry about it.

These privacy addresses are what the client uses to talk to the world, but the client will also respond on its SLAAC address. Privacy addresses are also changed periodically. When a privacy address changes many clients hold on to the old one in case there’s any incoming traffic still trying to use it.

Long and short of all this is you have to ensure your network equipment can handle the number of IPv6 addresses required for the number of clients being supported.

In our testing so far we’ve seen an average 2.6 IPv6 addresses per client. We think our routers could just handle that for our regular concurrent client count but with no room for growth it’s asking for trouble.

It’s worth mentioning that whilst we really do want to provide globally routed IPv6 addresses to the WiFi clients, this isn’t something we actually need to do right now, but do expect it will be required in the future. And we do have options available if we had to make this work right now, the easiest being to spread the subnets over a few routers so as to avoid the need to replace the core routers. We could also just buy some hardware with enough capacity to handle just the WiFi traffic routing.

This situation though presents an opportunity to look again at our whole network and maybe simplify some of it, using technologies such as VXLAN that weren’t available on the hardware we were using previously.

Suffice to say our Wi-Fi is ready for IPv6, the firewall rules are built and tested, the radius accounting all works… we just need the rest of the network to catch up.

Wireless home automation

Some people are massively into home automation, with a motor and remote control fitted everywhere they possibly can be. I’ve largely not really seen the point of it. I live in a small house, the light switch is never far away. I’ve also found it baffling that in order to switch on the light I might need an internet connection.

However, I did buy a internet connected heating control system opting for Hive by British Gas. The system is easy to install and designed to be a direct replacement for many UK domestic installations. The wireless side of the system uses zigbee and it consists of a boiler control, wireless thermostat and hub that connects to your network. Overall it’s worked well in allowing me to remote control the ancient heating system in my house, but it isn’t really very sophisticated.

The Hive thermostat is a bit…. basic. As far as I can tell it’s old school in that it runs the heating until the temperature measured by the thermostat reaches the target and then stops. The problem is the radiators are then hot, so the temperature in the room keeps rising and will significantly overshoot the target. Before the room temp has dropped to below the target it can start to feel a little cool, because we’ve just acclimatized to that higher temperature. The result is you turn up the heating and end up running the system at a higher temperature than is necessary to be comfortable.

This is how heating control systems have worked for years, but there’s a much better way. Secure (Horstmann) and a few others implement something called Time Proportional Integral (TPI). I don’t pretend to know how this works, but the result is the heating system runs for shorter bursts, switching a predetermined number of times per hour until the temperature is reached and reducing the overshoot that’s common with simple thermostat control.

We have recently got a place in Northern Ireland which we’re using as a base to visit family more frequently. The controls here use TPI but they’re otherwise a standard wired system and I want remote heating control so I can keep an eye on the temperature to make sure it isn’t getting too cold, and also it would be really useful to be able to turn the temperature up before we visit in winter.

Hive is out for the reasons above. Other systems such as Nest that do clever learning of your life patterns are useless in a building that’s not fully occupied all the time. So I’ve gone to rolling my own using Z-Wave controls and Home Assistant with the hass.io distribution on a raspberry pi.

Z-Wave is a really interesting wireless home automation protocol. Like zigbee it employs low bit rate, low energy RF so devices can be battery powered. It is a proprietary protocol though, unlike Zigbee, and whilst I tend to prefer open standards in the real world having a proprietary chipset in every device means it’s easier to get devices from different manufacturers to work together. I have a USB adapter in my raspberry pi so it can act as the Z-Wave controller but a particularly neat feature is devices can be directly paired.

This means I can setup my thermostat to directly control the boiler switch. The state of the two devices is also reported on the Z-Wave network. There’s a really big win with this. If I had a temperature probe in the room and my automation server had to turn on the heating based on a rule what happens if my automation server fails? No heating. Also, adjusting the heating becomes harder. The beauty of using Z-Wave controls, and directly pairing them, is I can have a normal looking thermostat on the wall, and this directly controls the heating. But then I can control the temperature set point of that thermostat remotely using Home Assistant. I can also override the boiler control should the thermostat fail (unlikely) or the batteries run out (more likely).

This gives me the same level of control I have with Hive, but the system isn’t reliant on the hub device being in the middle, I only need my thermostat and my boiler control to make it work. Then you can start getting into the smarter automation functions. Home Assistant can pull in calendar information using caldav and turn that into a switch. So I can automate whether the heating is set above frost protect based on whether there’s a booking in the house booking diary. Which means I don’t have to worry about a visitor using our house turning the heating up and leaving it.

Using Home Assistant with Z-Wave allows for other neat control options such as lighting, blinds, whatever, in order to make an empty home look less empty. But it also allows for those controls to always have a local activation so when a family member who doesn’t own a smartphone wants to use our house, that’s no problem. Essentially I can build up a home automation system to be as simple or sophisticated as I want, but never need to have an internet connection in order to turn on the bathroom light.

But for now, it’s just going to be the heating.