You’ve just upgraded the network with the latest Wi-Fi6 APs – this promises to be faster, with lower latency and all round better for everyone and everything… great! But…. there are rumblings.
During your testing you found a number of the corporate laptops used an Intel Wi-Fi NIC and the driver had never been updated… these hit a well known bug that causes the driver to ignore Wi-Fi 6 enabled BSSIDs. No problem, because you did the testing that issue was found and a new driver was deployed.
Despite all your efforts, a number of helpdesk calls have come in from users complaining they can’t connect to the network any more. Some of them can’t even see the network…. Hmmm.
Turns out these machines haven’t had the new driver deployed by Group Policy because they’re not part of the domain. They’re BYOD, they have the same ancient driver and they won’t play ball with the 802.11ax network you’ve just deployed.
That’s not all. The old network didn’t have any of the roaming enhancements enabled and with all change it seemed the perfect opportunity to enable them: 802.11k/v/r all switched on.
Some of the misbehaving laptops can connect to the network, sometimes, but things are really unreliable. These also have an older Intel 7260 Wi-Fi chipset but updating the driver doesn’t help.
You’ve been struck by another Intel bug where the presence of the 802.11K Quiet information element upsets things and they break. This time it’s a hardware problem.
So do you switch off 802.11ax and 802.11k on any SSIDs used for BYOD or do you say “tough, your old stuff might not work any more”?
That, of course, is a policy matter.
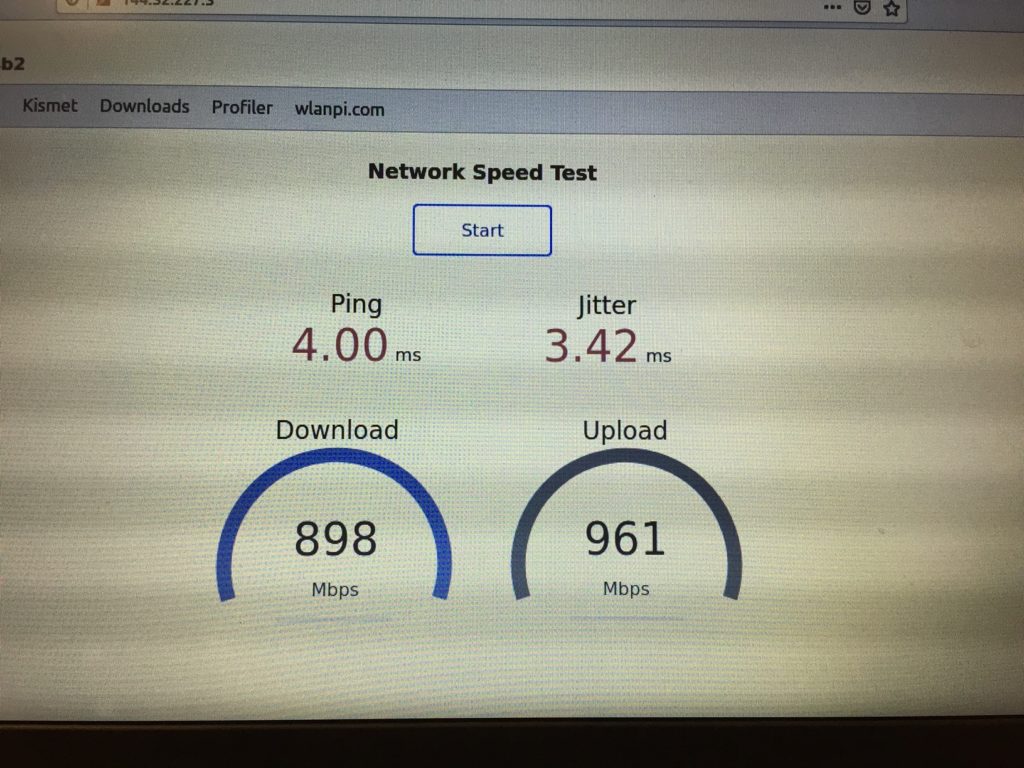
When I encountered both these issues in a recent deployment, the decision was to take the path of least resistance and disable the functions. This means the network can’t benefit from the performance and capacity benefits offered by Wi-Fi6.
Not having any control over BYOD clients means they may end up dictating terms for the network. That might be fine, if it fits the policy, but in this scenario it was done because it was easiest, it made the problem go away. If that decision isn’t revisited later the network will always be operating below it’s potential.